Showing posts with label Dessert. Show all posts

Friday, December 30, 2011

Cookie Dough Truffles


Tastes like real cookie dough minus the raw eggs wrapped in chocolate. If you like cookie dough, this is going to hit home like no other comfort food.

Ingredients:
8 tbsp. unsalted butter, at room temperature
¾ cup light brown sugar, packed
2¼ cup all-purpose flour
1 (14 oz.) can sweetened condensed milk
1 tsp. vanilla extract
½ cup mini semisweet chocolate chips
1½ lb. semisweet (or bittersweet) chocolate, coarsely chopped
Mini chocolate chips (for garnish)

Servings: 30-40 truffles

Instructions:
Combine the butter and sugar in a mixing bowl and cream on medium-high speed until light and fluffy, about 2 minutes. Beat in the flour, sweetened condensed milk and vanilla until incorporated and smooth. Stir in the chocolate chips. Cover with plastic wrap and refrigerate until the mixture has firmed up enough to form balls.

Shape the chilled cookie dough mixture into 1-1½ inch balls. Place on a baking sheet lined with wax paper. Cover loosely, transfer the pan to the freezer and chill for 1-2 hours or until very hard and frozen.

When ready to dip the truffles, melt the chopped chocolate in a heatproof bowl set over a pot of simmering water (double boiler). Removing only a few truffles at a time from the freezer dip each chilled truffle, one at a time, coating in chocolate, use a fork to remove and tap gently to remove the excess. Use a fork and the edge of a knife (I use a fondue fork) to slide the truffle onto a silicone sheet or wax paper.

If at any point during dipping, the cookie dough balls become soft and less frozen, return to the freezer to chill for 30 minutes.) If using mini chocolate chips for garnish, sprinkle on top quickly after dipping each truffle before the chocolate sets. Once all the truffles have been dipped, store them in the refrigerator until ready to serve.

Recipe From: Dainty-Chef.com

I was stunned at how much these tasted just like cookie dough. Right down to the gritty butter sugar texture. If your one to eat raw cookie dough, this is going to hit the spot. The one warning I have is that they have the texture of cookie dough too. You will need to freeze these in order to dip these. Then your going to have to really keep these in the fridge or they will start to sweat after they are dipped.

But another good recipe to add to your truffle collection!

Eggnog truffles


Soft creamy boozy eggnog goodness. Over the top rich and strong eggnog flavor

Ingredients:
130g white chocolate, finely chopped *
1 ½ tablespoons heavy cream (or commercial eggnog)
1 ½ tablespoons rum – or to taste
1/8 teaspoon freshly ground nutmeg – or to taste**
cocoa powder, for rolling the truffles

*I used Godiva, you MUST use good quality white chocolate in this recipe. No white chocolate baking chips!
**I used a dash or two more, but my nutmeg is old and low quality

Servings: This made 8 (2 tsp) truffles

Instructions:
Place chocolate and cream/eggnog in a small heatproof bowl and melt over a saucepan of simmering water (Double boiler), stirring until creamy and smooth. Remove from the heat, add the rum and nutmeg and mix to combine. Taste! See if you need more rum or eggnog. If you want a more boozy taste add a bit more with a little bit more chocolate. If you need more eggnog taste add more nutmeg.

Set aside to cool, then cover the bowl with plastic wrap and refrigerate until firm, about 3 hours or overnight. Using a small cookie-scoop or a small spoon, make truffles with 2 teaspoons of ganache per truffle and roll into the cocoa powder.

Place in fluted paper cases. Keep refrigerated. Truffles can be refrigerated for up to 5 days.

Recipe From: TechniColorKitcheninEnglish.blogspot.com

I found these truffles to be amazing, my favorite truffle recipe of all time. No really, doesn't get better than this. I don't think I will ever try another eggnog truffle recipe, this one was perfect!

I used Godiva white chocolate, commercial store bought eggnog (super thick stuff, not all homemade eggnog will work, use heavy cream if in doubt), Captain Morgan Private Select Rum and rolled them in Hershey's unsweetened cocoa powder.

They did come out a bit soft, in a good way, but these need to stay refrigerated or you will need to add in some more white chocolate. The same thing if you want to dip them, they will need more white chocolate to firm up. I would not however recommend dipping them, they came out perfect rolled in cocoa powder.

Tuesday, December 27, 2011

Whirl Cookies


Whirl cookies are a source of great controversy in the Bechberger household. You either fall on the side of white swirl on the outside or chocolate swirl on the outside. There is a difference! This year I just made the white on the outside, but I secretly doubled the chocolate in the chocolate recipe and I love how it came out.

Ingredients:
1 cup butter
1 cup sugar
1 large egg
1 teaspoon vanilla
3 cups flour
1/2 teaspoon baking powder
1/2 teaspoon salt (if you used unsalted butter)
4 squares/ounces melted chocolate

Servings:
Makes about 30 cookies

Instructions:
Mix all the wet ingredients then add the dry ingredients. The dough is often soft enough to add the chocolate to half the batch at the end if you would prefer.

I find it easier to either make two batches; one all white and one all chocolate or halve the recipe and make each separately. The half batch proportions are 1/2 cup butter, 1/2 cup sugar, 1/2 teaspoon vanilla, 1 1/2 cups flour, 1/4 teaspoon baking powder, 1/4 teaspoon salt and if chocolate 4 oz melted chocolate.

Roll out each dough between saran wrap. You could chill the dough if you want to roll it with a rolling pin, but I am impatient and roll it freshly made between two pieces of saran wrap. Roll each to 1/4 inch thick in roughly the same shape. Rmove the top layer of saran wrap on each and lay dough side together. Again remove one side of saran wrap and roll up like a jelly roll.


You can chill the dough to slice, but I find it so much easier to just go ahead and slice with dental floss. place the floss under the log and cross over the top. Pull on the floss in opposite directions and you will get a nice perfect slice no matter how warm the dough is.


Place slices on parchment paper and bake for 8-10 minutes (just barely starting to turn golden on the edges) in a 400 degree F oven.


Pin It

Monday, December 26, 2011

Oreo Cheesecake Truffles

A soft chocolaty center en-robed in milk chocolate that come together quick. These were huge hit at the Christmas exchange and didn't suck up my oven!

Ingredients:
1 (16 ounce) package OREO Chocolate Sandwich Cookies, divided
1 (8 ounce) package Cream Cheese, softened
2 (8 ounce) packages BAKER'S Semi-Sweet Baking Chocolate or Chocolate Almond bark (what ever chocolate you want to use really)

Servings: ~30-40 truffles

Instructions:
Crush the heck out of ~36 cookies or so, your looking for about 3 cups of crushed Oreos. I did this with my little mini chopper, but you could easily do this with determination, a rolling pin and a bag. While the recipe is forgiving a few chunks are not so bad, you want the bulk of the cookies to be down to coarse sand size. Feel free to blitz a few extra cookies and set aside if you want to sprinkle the cookie bits on top.

With the ~3 cups of cookie sand, add in the 8 oz package of cream cheese and blend until smooth. I did this in my kitchen aid as blending it smooth with a spoon was proving unwieldy. You want this to be smooth, really smooth and well mixed. Don't worry about crushing the cookies more, get out the hand mixer or use the stand mixer and mix well but don't whip, no need to get air in there.

You should end up with something the consistency of play dough or a little thinner, this stuff should be thick (hence the difficult to mix). If it seems too thin to work with or your house is too hot, put it all in the fridge, covered and let it chill for a bit. Then take it out and roll it into balls. I used my 1 tbs cookie scoop* leveled (found this to be a good 2 bite truffle size) to measure out the "dough" and then rolled it into balls using my hands.

Once these are in ball form, chill them! Heck if you want freeze them. Your about to dunk them into melted chocolate and the colder they are the "cleaner" your chocolate will stay. So if you don't want crumbs in your chocolate, chilling is crucial and if you don't want a mess, it is still important.

Pop these in the fridge or freezer for an hour or two or over night. When your ready, bring the ~16 oz of your preferred chocolate up to temp in a double boiler**. Don't cheat and use the microwave your going to end up going back and forth warming and stirring and wasting a lot of time. Once the chocolate is melted, take some of the truffles out (do this in batches and keep the rest in the fridge or freezer).

Drop one truffle at a time into the melted chocolate, turn over gently to coat and then remove with a fork, tap the ball on the edge of the boiler to remove excess chocolate. Carefully use the edge of a knife (I used a fondue fork) to slide the ball onto waxed paper or a silicone sheet. If your going to sprinkle cookie bits on top, do it now before the chocolate cools. Repeat, for what seems like ever, with all of the cookie balls.

Refrigerate until firm, about 1 hour. Store leftover truffles, covered, in refrigerator.

Recipe From: Everywhere! This seems to be all over the internet, in pretty much this exact form. I think it is even on Nabisco and Philadelphia's web site. You will find almost no variation from site to site other than the kind of chocolate on the outside.

Some notes
*I used to think people who used cookie scoops were Nancy pants who didn't like to get their hands dirty. I bought the set of 3 after seeing so many sites using them, and now feel I should kick myself for waiting so long. Well worth it, use them all the time now.

**I cannot stress enough the importance of the double boiler on a project like this. The microwave method is going to be a huge pain, don't skip this part. You have 30-40 of these to do. Just get a a medium sized pot and a glass bowl. Fill the put 1/4-1/3 full of water and place the bowl on top. The water should not touch the bowl. Turn the heat onto medium, you want the water to simmer. Toss all the chocolate on top and stir as it melts. This will keep your chocolate the perfect temperature. And don't spend money to buy one, glass bowl and pot work great and you already have them.

I thought these were easy and the best part, oven free. I wont say super quick, dipping all these guys took a bit of time though you get faster after your first few. Using a silpat was perfect and any extra chocolate around the base could easily be broken off after so don't worry about a little waste on the silicone.

You can really use any cream filled cookie for this, though chocolate is every ones favorite it seems. I plan to try them out with Nutterbutters in the near future. I also adapted this recipe using gingersnaps, but I will post that on a separate blog as there are a few more nuances that I discovered.

Easy, almost no bake (only melted chocolate) and they seem to be a hit with the chocolate crowd.

Sunday, December 18, 2011

Rugelach - My favorite Holiday Cookie


Rugelach is my favorite holiday cookie. The dough turns out incredibly flaky and moist filled with cinnamon and nuts (raisins optional). Just be careful too cook them long enough in the middle to be fully cooked. I used to make circles, then roll them like croissants, but found they don't cook as evenly as cylinders.

Ingredients:
Dough
2 cups flour
1/4 tsp salt
1 cup butter, cubed
1 - 8 oz package cream cheese
1/3 cup sour cream
Filling
1/2 cup sugar
1 1/2 tblspn cinnamon
1 cup finely ground walnuts
1/2 cup raisins (optional)

Servings:
about 30 cookies

Instructions:
In mixer cream butter and sugar, then cream cheese, eggs, salt, sour cream, and last flour. If it's too wet to handle you could add more flour, but it will be a sticky dough. Adding too much flour will make it a tougher cookie. Chill if it is too difficult to roll out.


Flour the work surface and the dough if needed. Roll out in a cylinder and top with the filling. Press filling lightly into the dough. Begin rolling the cylinder from one end, about 3 times. Cut along the cylinder and set aside. Keep rolling and cutting till it is all rolled. Then cut each cylinder every 1-2 inches. Place each cookies an inch apart on parchment paper. Bake a few cookies to start to get the baking time down (open up to check center is done). Depending on home much you rolled it they can bake from 20-35 minutes. Luckily, this is a forgiving dough and the sugar is the first thing that will burn on the bottom of the cookie. If you find you can't cook the center without burning the bottom, lower baking temp or roll thinner. Cool and store in airtight container.


Recipe Modified From:
Allrecipes.com

Heaven - aka Nutella Swiss Buttercream Frosting and Ice Cream Cone Cupcakes


Two recipes here. One for "Heaven" frosting which is a swiss buttercream frosting; ideal for those who hate the sugary buttercream frostings almost all cakes have. When I added Nutella, I literally cried out "Heaven," hence the name. The other is for ice cream cone cupcakes - cake baked in an ice cream cone. The picture above is of a cake I made for 3 friends' 30th birthday party (myself included). The cake is made out of structural elements inside and Little Debbie and Hostess goodies outside. The top layer is actually a spice cake covered in the Nutella Swiss Buttercream. Spice cake was forgettable, but the frosting was "Unforgettable... That's what you are. So unforgettable..."

Ingredients:
1 cup sugar
4 large egg whites
26 tablespoons butter,
softened (3 sticks plus 2 tablespoons)
1 teaspoon vanilla extract
1 cup nutella

Recipe for the Ice Cream Cupcakes below (soooo easy!)

Servings:
For a 9-inch cake (plus filling, or some to spare)

Instructions:
Whisk egg whites and sugar together in a big metal bowl over a pot of simmering water. Whisk occasionally until you can'€™t feel the sugar granules when you rub the mixture between your fingers. Transfer mixture into the mixer and whip until it turns white and about doubles in size. Add the vanilla. Add the butter slowly a couple cubes at a time and whip, whip, whip. It may look curdled at one point, but keep whipping until all the butter is added. Then taste. Lick fingers clean. Taste again. Add the cup of Nutella. Whip. Taste. Tell the guests to go away the frosting is all yours. Threaten them with the licked clean spatula. Call a help line, you have a problem...

Recipe Modified From:
Smitten Kitchen" for full instructions. Some people report this was tricky to make, but it came together so easy for me. I had never made swiss buttercream before and had some Nutella I wanted to use up before moving. I searched for a frosting I thought would have a similar consistency and handle adding Nutella to it. Little did I know how wonderfully this frosting would come out even without the Nutella. Adding the Nutella just took it over the top - hence the name "Heaven." If you don't have to ice shapes on your cake, you just need to add more deliciousness, I would recommend swiss buttercream frosting above any other (unless it has to sit out in the sun - it is mostly butter after all).


Ice Cream Cone Cupcakes

Ingredients:
One box mix and necessary ingredients (I used red velvet for the holidays)
One box of ice cream cones (yes those cheap flavorless ones...)
One batch Nutella Swiss Buttercream Frosting

Put ice cream cones into a high sided pan (so they can't fall over when you move the pan). Mix together box mix cake with needed ingredients. Pour batter into ice cream cones about 3/4 full. Too full and they will run over. Bake according to cupcake cooking times. When done pull out and cool. Frost. Decorate. Easy and delicious!

I was so shocked as a young teen the first time I had these. It was amazing to me that you could bake cake in the ice cream cones and it comes out better than either of the two alone. I was glad to find out the other day that others have similar reactions when a group of friends had them for the first time. Need to make cupcakes for a class, want less mess? Try these!

Sunday, October 23, 2011

Caramel Apple Cheesecake Cookie Bars with homemade Apple Cider Caramel Sauce


An over the top sweet fall treat filled with apples and cinnamon drizzled with apple cider flavored caramel on top of cheesecake and a crunchy buttery crust.

Caramel Apple Cheesecake Cookie Bars with homemade Apple Cider Caramel Sauce

Ingredients:
Dough:
1 cup All Purpose Flour
1/2 cup brown sugar
1 cup butter

Cream Cheese Filling:
2 8oz packages cream cheese, softened
1/2 cup white sugar
1 tsp Vanilla extract
2 eggs

Apple Filling:
2 Large apples (firm)
1/2 tsp cinnamon
2 tbsp white sugar

Crumb Topping:
1/2 cup oatmeal
1/2 cup brown sugar
1/2 cup butter (room temp)
1 cup all purpose flour

Apple Cider Caramel:
3/4 cup apple cider
1/2 cup butter
1 cup sugar
2 Tbsp maple syrup
3 Tbsp corn starch
1 tsp ginger powder
Dash or two of cinnamon
2 Tbsp lemon juice
pinch of salt (opt’l)
**You will only use about half of this for the Cheesecake bars, so half the recipe if you don't want any left overs, but trust me, you will.

Servings: One 9x13 pan or two 8x8 pans

Instructions:
Caramel Apple Cheesecake Cookie Bars

Preheat the oven to 350 °F (175 °C).

In a bowl, combine the flour (1 cup – 140 grams) and brown sugar (1/2 cup – 100 grams). Cut in the butter (1 cup – 230 grams) with a pastry blender (or a fork) until the mixture is crumbly, kinda. If your butter is closer to room temp, just toss all that together and cream it in the mixer, you will end up with the same thing. A gooey dough.

First with lightly floured fingertips, then with the bottom of a cup (or a glass), press the dough evenly into a 13 × 9-inch (33 x 22 cm) baking pan or a cookie sheet with edges. Bake 15 minutes or until lightly browned. It will look wet and under baked, you will think you have screwed up, it is fine.

In the meantime, in a larger bowl, beat the cream cheese with 1/2 cup sugar until smooth (about 1 minute). Add the eggs, 1 at a time (beat about 20 seconds after each addition). Next add the vanilla and mix until combined.

Peel the apples and chop them into 1/2-inch chunks. Mix the apple chunks with the cinnamon and two tablespoons white sugar. Add a dash of pumpkin pie spice if your so inclined.

Pour the cream cheese batter over the warm crust. Spoon the apple chunks evenly over the cream cheese mixture. Or place them evenly over the cream cheese if your a bit anal about it like I was.

In a smaller bowl, combine the flour (1 cup – 140 grams), oats (1/2 cup – 60 grams), and brown sugar (1/2 cup – 100 grams) for crumb topping. Cube the butter (1/2 cup – 115 grams) and using a pastry blender (or a fork), create a crumbly mixture.

Crumble over the cream cheese mixture. Bake 30 minutes, or until the filling is set. Reduce the temperature to 300 °F (150 °C) for the last 5 minutes.

Cool these over night in the fridge. You might be able to cool them for 5 hours or so before slicing but they need to be cold in order to cut them! Drizzle with the Apple Cider Caramel sauce listed below when they are fully chilled. You can make the sauce the same day as the cheese cake and just rewarm prior to drizzling.

Apple Cider Caramel sauce

Dissolve the corn starch into the cold apple cider.

Add the cider/starch to a sauce pot with the other ingredients. Bring the mixture to a boil – stirring constantly. When the bubbling becomes intense, reduce to medium heat and continue stirring until the mixture thickens a bit. Remove from heat. Pour the sauce into a bowl

Recipe From: Caramel Apple Cheesecake Cookie Bars from ZoomYummy.com and Apple Cider Caramel Sauce from Family-kitchen

I think next time I want to try the crust with a 1/2 cup more flour. The whole thing had too much butter and was too wet in my opinion, when chilled this isn't a big problem but some of the butter had congealed on the bottom when I sliced them and I found that to be an indication of too much butter. I have seen other recipes for this call for 2 cups flour which I think would be fine but lead to a more dense crust. I think 1.5 might be perfect but I have not tried it yet.

The original recipe called for regular caramel sauce, with an implication of store bought. So not skip the apple cider caramel sauce. You will get so much more apple goodness out of this recipe. I think it takes it from food to wow. The apples are a bit faint without it, this brings them to the forefront.

This recipe is also very sweet and very buttery. It is not diet friendly. If you have someone who doesn't care for sweets, don't make this. You could possibly cut some or most sugar from the cheesecake layer since the caramel and streusel topping carry enough sugar to make up for it to cut down on an overly sweet taste. Better still would be to cut some from the caramel but tinkering with sugars in caramel gets complicated and might take some trial and error.

The left over cider syrup would be great on pancakes, waffles, ice cream, apples, crisps, crumbles, pumpkin cakes and breads... just about anything fall flavored!

Sunday, July 17, 2011

Spiced Up Healthy Zucchini Bread


This is a healthy and fantastic zucchini bread. Moist and packed with flavor and not too much guilt in each slice. Not only will you not notice your eating your vegetables but you will enjoy every minute of it.

Ingredients:
2 C grated zucchini, about 3 small to medium zucchinis
1 C all purpose flour, sifted
1 C Whole wheat flour
3/4 C granulated sugar
1/2 tsp all spice
1/2 tsp cloves
1/2 tsp nutmeg
1/2 tsp ground ginger
2 tsp cinnamon
1 tsp baking powder
1 tsp baking soda
2 large eggs
1/2 C apple sauce
1/4 C oil
1 tsp vanilla extract

Servings: 1 Loaf

Instructions:
Preheat oven to 350º. Spray 10 inch loaf pan with cooking spray.

Combine all of the dry ingredients in a medium bowl.

Whisk eggs, oil and vanilla in a large bowl. Gradually add the dry ingredients to the wet ingredients and stir with a rubber spatula or wooden spoon to combine. Add grated zucchini and stir. It may seem a bit difficult or hard to mix it all together at first but the moistness from the zucchini will help it all come together.

Pour mixture into the prepared loaf pan and bake on middle rack for 50 to 60 minutes or until toothpick comes out clean.

Let sit in pan for 10 minutes and then let cool on wire rack.

Recipe From: KitchenRunway.com

The original recipe didn't have enough "spice" for me, I doubled everything and added some ginger for a bit more kick. I also did half and half all purpose flour and whole wheat, but I think you might be able to do all whole wheat, all the zucchini moisture keeps things super moist. I also cut down on the oil by subbing apple sauce (1 single serving cup is 1/2 cup) to cut out some more fat.

A sugar substitute could be used, but I don't have any of that in the house. Instead I cut the sugar from 1 cup to 3/4 cup, cutting it to 1/2 cup sugar might be too little but if your one to put cream cheese or butter on your bread you might not notice (I eat mine plain).

If your a nut fan this would lend itself to taking nuts well, I added some roasted almonds on top just to make it look pretty. You could also toss oats on top for a nice look too. I think you could toss in raisins, dried cranberries or dried cherries, heck all three and you would still have a nutritious and tasty bread.

This recipe is far from bland and so moist if you slice it while its warm you will worry you under cooked it. Don't panic, the bread is just fine and needs to sit for a short bit and cool for it to finish.

Friday, July 15, 2011

Blueberry-Streusel Bars with Lemon Cream Filling


These little bars are more blueberry than lemon, but have just enough lemon to make the lemon lovers happy. A great pairing of the two flavors with a streusel topping that adds some crunch.

Ingredients:
3 cups (13-1/2 oz) all-purpose flour
1 1/2 cups rolled oats (not quick oats)
1 1/3 cups packed light brown sugar
1 teaspoon salt
1 teaspoon baking powder
1 cup (2 sticks) unsalted butter, at room temperature
1 large egg, separated
14 oz can sweetened condensed milk
1/2 cup fresh lemon juice (2-3 lemons)
2 teaspoons lemon zest (2-3 lemons)
3 cups room-temperature blueberries

Servings: 1 9x13 Pan or 2 8x8 pans

Instructions:
-Preheat oven to 350 F. Line a 13x9 metal baking pan with foil, leaving a slight overhang on both sides to lift the bars out. Spray the pan/foil with cooking spray. If you forget to line the pan, or don't have the stuff for it, don't panic. Just easier to make these look pretty when you can lift them out.

Mix the flour, oats, brown sugar, salt and baking powder together in a mixer or large bowl. Use a pastry blender (or your fingers) to cut the butter into the dry ingredients completely (again, or just use the mixer) until fine and sand like. Set aside and reserve 2 cups of these crumbs for the topping.

Beat the egg white with a fork until broken up and foamy. Add it to the crumbs and mix to incorporate. Transfer the mixture to the prepared pan (or pans) and press to form an even layer of crust. Bake for about 10-12 minutes, or until the top starts to look dry.

Meanwhile, whisk the condensed milk, lemon juice, lemon zest, and egg yolk together in a medium bowl. Let stand for 5 minutes; the mixture will begin to thicken slightly.

When the crust has finished baking, transfer the pan to a wire rack and sprinkle the blueberries evenly over the hot crust. Drop spoonfuls of the lemon mixture over the blueberries then spread the lemon mixture gently to distribute it. Work carefully so you don't crush the berries; the lemon layer doesn't have to cover every bit of the crust. Bake until the lemon layer begins to form a shiny skin, about 7-8 minutes.

Remove the pan to a wire rack and use your fingers to press the reserved crumb mixture into small clumps and sprinkle them over the lemon layer. Use all of the crumb mixture to cover the lemon layer completely. Bake for 25-30 minutes, or until the filling is bubbling at the edges and the streusel topping is golden brown.

Shortly after these come out of the oven, you can eat this with a spoon if you like to serve is sort of cobbler style. It is great this way. I made the mistake of trying to cut these bars while "just warm" as the original instructions say and found them to be a mess this way, but very tasty! Otherwise, cool and chill completely before trying to cut these into bars! Store in the refrigerator.

Nutritional Information:

Recipe From: Tracey's Culinary Adventures

I made these for a BBQ in two 8x8 pans (unlined), some day I will have an oven big enough for a 9x13 inch pan, some day. However I did each one of these one at a time. I baked the crust on one, applied blueberry and lemon, baked and then did the stopping. Then I did the other pan. I think it will get soggy if you try to leave the "filling" on the baked crust while waiting for the other one to finish, so careful.

I also don't see why you couldn't mix the blueberries and the filling and then spread in the pan. I didn't try it, but co crazy with it, I don't think it will matter one bit.

I added more blueberries than the original recipe called for (they wanted 2.5) but I had thawed about 3 cups and I think this worked better any way. The blueberries more "evenly coated" my two 8x8 pans. Maybe in a 13x9 the 2.5 cups would have been perfect but I wanted the extra that I had thawed. Also, feel free to use frozen. Fresh would be better I am sure, but frozen still made one tasty bar.

Serve them warm or cold, I found both ways tasty. Cold makes great bars, warm makes great spooned "crisp". Warm with good vanilla ice cream might be perfect for a winter treat.

Tuesday, June 14, 2011

Blackberry Pie Bars


If you don't like overly sweet desserts but still like buttery rich flavor this recipe will hit the spot. It also uses frozen blackberries instead of fresh so it can be made year round.

Ingredients:
Crust and Topping
3 cups all-purpose flour
1 1/2 cups sugar
1/4 tsp salt
1 1/2 cups (3 sticks) unsalted butter, chilled

Fruit Filling
4 large eggs
2 cups sugar
1 cup sour cream
3/4 cup flour
pinch salt
zest of 1/2 lemon
1 tsp almond extract
2 (16-oz) packages frozen blackberries, thawed and drained

Servings: One 9x13 pan or two 8x8 pans

Instructions:
To make the crust and topping, preheat the oven to 350 degrees. Line the inside of a 9x13 inch baking pan or two 8x8 pans with parchment paper or foil and grease (this will help with removal after).

Combine the flour, sugar, and salt in the bowl of a mixer. Stir to mix for a minute or two. Cut the butter into 12 or so pats, and add to the flour mixture. Process until the butter is evenly distributed but the mixture is still crumbly (if it all comes together, don't panic, just a bit harder to make the crumb topping).

Reserve 1 1/2 cups of the mixture to use as the topping. Press the remaining mixture into the bottom of the pan (or pans), and bake 12-15 minutes. Cool for at least 10 minutes.

To make the filling, whisk the eggs in a large bowl, then add the sugar, sour cream, flour, salt, lemon zest, and almond extract. Gently fold in the berries and spoon the mixture over the crust. Bake for 30-40 minutes. Sprinkle the remaining flour mixture evenly over the filling, and bake 10-15 minutes (waiting to sprinkle it on top prevents the sprinkled bits from sinking in and makes for a prettier presentation).

Cool at least 1 hour before removing foil from pan and cutting into bars, or scoop out of the pan to serve cobbler-style.

**Note: telling when this thing is done is a bit of a challenge because the inside is always going to be a bit gooey. If you jiggle the pan and the whole thing is still mobile, keep baking. If it all seems pretty set and a tooth pick comes out mostly sort of clean your pretty much done. After making 4 of these I found there is a lot of wiggle room so don't panic. Bake the heck out of it and it firms up more, under bake it a bit and it is less bar like more cobbler like.

Nutritional Information:

Recipe From: http://www.pink-parsley.com/2011/05/ppq-blackberry-pie-bars.html

I thought this recipe comes out too buttery and didn't have enough blackberries. Come to find out later, my frozen blackberries come in 12 oz bags, not 16. So that might explain my lack of berries. But the butteryness is still a bit much for me, but everyone else raved about them. Over the moon raved about them, one person said that it may be the best dessert she has ever had.

I think in the future I might try a sugar cookie crust on the bottom instead of the uber buttery bottom that I think makes this dessert a bit much. But then again, these guys have grown on me as I ate some, froze some etc. Either way, raved over by most, liked by all. A nice quick summer treat and no loss for using frozen berries for once either!

Saturday, June 11, 2011

Salted Peanut Chews


Fluff-a-nutter sandwiches in much improved dessert bar form! Salty and sweet, chewy but not too gooey, it will satisfy all of your cravings in one little square.

Ingredients:
For the Base:
1½ cups all-purpose flour
2/3 cup light brown sugar
½ teaspoon baking powder
½ teaspoon salt
¼ teaspoon baking soda
½ cup unsalted butter, at room temperature
1 teaspoon vanilla extract
2 egg yolks
3 cups miniature marshmallows

For the Topping:
2/3 cup light corn syrup
¼ cup unsalted butter
2 teaspoons vanilla extract
1 bag (10 ounces) peanut butter chips (1-2/3 cups)
2 cups crisp rice cereal
2 cups salted peanuts

Servings: 1 13x9 Pan (or in my case 2 8x8 Pans)

Instructions:
1. Preheat the oven to 350 degrees F. In a large bowl, beat all the base ingredients except the marshmallows with an electric mixer on low speed until crumbly. Press the mixture firmly in the bottom of an ungreased 9×13-inch pan.

2. Bake for 12 to 15 minutes or until light golden brown. Immediately sprinkle marshmallows over the base. Base 1 to 2 minutes longer or until marshmallows just begin to puff. Cool while preparing topping.

3. In a 3-quart saucepan, mix all topping ingredients except cereal and peanuts. Heat over low heat, stirring constantly, just until the chips are melted and mixture is smooth. Remove from heat. Stir in the cereal and peanuts. Immediately spoon the warm topping over marshmallows; spread to cover. Refrigerate until firm, about 45 minutes. Cut into 36 bars. Store in an airtight container at room temperature.

Nutritional Information:

Recipe From: http://www.browneyedbaker.com/2011/03/24/salted-peanut-chews/

I saw these and thought they would go great in a care package! When I whipped them up and tested one out I found that they tasted exactly like an improved fluff and peanut butter sandwich, or Fluff-a-nutter as I used to call it as a kid. These are a great little treat, both salty and sweet at the same time.

Saturday, May 21, 2011

Nutterbutter Peanut Butter Cookies

Photo from Crepes of Wrath (I forgot to take a picture!)

Soft chewy peanut buttery goodness with bits of satisfying crunch from the Nutterbutters and peanut butter chips.

Ingredients:
3 cups all-purpose flour
1 cup sugar
1 1/2 teaspoons baking soda
1 teaspoon baking powder
1/2 teaspoon salt
1/2 cup shortening
1 cup peanut butter (I like crunchy, but creamy works, too)
1 cup honey
2 eggs, room temperature
1 12 oz. bag peanut butter chips
15-20 crushed Nutterbutter cookies (not too crushed – it’s fun to have some big chunks of Nutterbutter in there)

Servings: 25-30 cookies

Instructions:
1. Preheat the oven to 350 degrees F. In a bowl, combine the flour, sugar, baking soda, baking powder and salt, and set aside. Beat the shortening, peanut butter and honey together for 3-5 minutes, until smooth. Add in the eggs one at a time and mix well. Gradually add in the flour mixture, mixing until just moistened. You will be folding in your Nutterbutters and peanut butter chips later, so you can finish up any mixing at that point.

2. Fold in the Nutterbutter cookies and peanut butter chips. Roll the dough into balls and then pat down into disks and place on greased and/or lined baking sheet and bake for 9-11 minutes, until just barely golden (I like very soft, chewy peanut butter cookies). Remove from oven and let cool for a bit on your cookie sheets before removing and placing on another surface to finish cooling.

Nutritional Information:

Recipe From: http://crepesofwrath.net/2010/12/31/nutterbutter-peanut-butter-cookies/

If you want these cookies to be nice and soft, then really, remove them when they are just barely golden brown. They will seem soft, too soft. But let them cool for a bit on the cookie sheet, then carefully remove them and place them on a cooling rack. Once they are fully cooled, they will be just fine. If you prefer a harder cookie you can cook these guys a little more, but after having tried it both ways, the soft cookie is much better.

Also make sure you pat the cookies down a little bit, the original instructions left this out. I had rolled the cookies into a ball and tried to cook them that way, they will not flatten out and don't cook properly. Shape them close to what you want them, I went with big thick soft cookies!

White Chocolate Gingerbread Bars


A nice soft and chewy gingerbread bar with touches of white chocolate. A great alternative to brownies or gingerbread cookies for the holidays.

Ingredients:
2 cups all-purpose flour
2 teaspoons ground ginger
1 teaspoon cinnamon
1/4 teaspoon nutmeg
1/4 teaspoon ground cloves
1/2 teaspoon baking soda
1/2 teaspoon salt
1/2 cup + 2 tablespoons (10 tablespoons) unsalted butter, softened
3/4 cup packed brown sugar
1/2 cup granulated sugar
2 large eggs
1 teaspoon vanilla extract
1/4 cup molasses
1 cup white chocolate chips
1/2 cup white chocolate chips, melted (for drizzling)

Servings: One 13x9 pan or 2 8x8 pans or ~36 squares

Instructions:
1. Preheat oven to 350 degrees. Line a 9×13-inch pan with foil (or two 8x8 pans), then spray it with nonstick cooking spray. Set aside.

2. Add the flour in a medium bowl. Then add in the ground ginger, ground cinnamon, ground nutmeg, ground cloves, baking soda, and salt, then set aside.

3. In large mixing bowl, cream together the butter, brown sugar, and granulated sugar. Add in the eggs one at a time, beating just to combine after each addition. Mix in the vanilla and molasses (if it looks strange, it’s okay, don’t worry!). Add in the flour and spices mixture and gradually combine. Stir in white chocolate chips by hand.

4. Press the batter into your prepared pan. I used clean hands because the batter is pretty thick.

5. Place into oven and bake until bars are golden brown and a toothpick comes out mostly clean with a few crumbs attached, about 20-25 minutes. Remove and place pan on wire wrack to cool completely before cutting. When the bars are mostly cooled, melt the 1/2 cup of white chocolate chips and drizzle over the bars either with a spoon or a plastic bag with the tip cut off.

Nutritional Information:

Recipe From: http://crepesofwrath.net/2010/01/04/white-chocolate-gingerbread-bars/

I thought these sounded different and tasty, so I whipped them up for a BBQ. I love almost anything with nutmeg, cloves, ginger and cinnamon so this was right up my ally, especially as it included white chocolate. This may have replaced gingerbread cookies in my house for the holidays. Moist and chewy with all the holiday flavor goodness.

They really couldn't be much easier, except for maybe the "drizzling" part. I couldn't get my white chocolate to melt properly and ended up "smearing" the white chocolate on top. Honestly next time I might just add all of the white chocolate into the mix and see how that comes out. Not as pretty that way, but efficient, or perhaps try a white chocolate glaze on top instead.

Monday, May 9, 2011

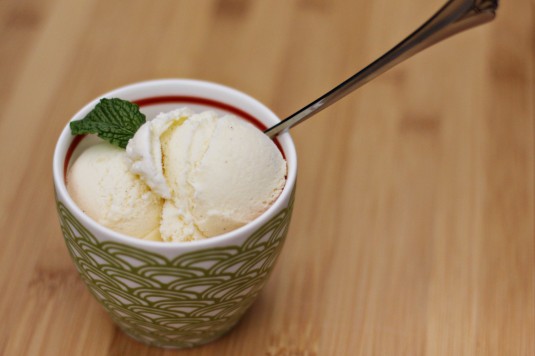
Vanilla Bean Ice Cream


This is a quick and easy Vanilla Bean Ice Cream that doesn't require any eggs. It goes together quick and packs a lot of flavor.

Ingredients:
2 cups half-and-half
1 cup whipping cream
1 cup minus 2 tablespoons sugar
2 tablespoons peach preserves (not jelly)
1 vanilla bean, split and scraped

Servings: 1 Quart

Instructions:
Combine all ingredients (including the bean and its pulp) in a large saucepan and place over medium heat. Attach a frying or candy thermometer to inside of pan. (see note below) Stirring occasionally, bring the mixture to 170 degrees F. Remove from heat and allow to cool slightly. Remove the hull of the vanilla bean, pour mixture into lidded container and refrigerate mixture overnight to mellow flavors and texture.

Freeze mixture in ice cream freezer according to unit's instructions. The mixture will not freeze hard in the machine. Once the volume has increased by 1/2 to 3/4 times, and reached a soft serve consistency, spoon the mixture back into a lidded container and harden in the freezer at least 1 hour before serving.

NOTE: If you do not have a thermometer, bring the mixture just barely to a simmer. As soon as you see a bubble hit the surface, remove it from the heat. Do not let it boil

Nutritional Information:

Recipe From: http://www.foodnetwork.com/recipes/alton-brown/serious-vanilla-ice-cream-recipe/index.html

I made this ice cream for Supper Club to go under my Hawaiian Pineapple and Ginger Dessert. When combined with the ginger and pineapple I thought this ice cream was perfect but when eaten by itself I found it to be a bit too sweet.

I think next time I make this ice cream I would try it with almost a 1/2 cup less sugar, however I am not sure if that would mess up the ratios as ice cream can be a delicate thing!.

And don't worry, the peach preserves don't add any "peach" to the ice cream. It somehow just helps blend the whole thing together.

Reeses Peanut Butter Cup Blondies


A chewy peanut butter brownie-like bar studded with white chocolate and Reeses Peanut Butter Cups. A great alternative for the non-chocolate lover in the group.

Ingredients:
2 cups all-purpose flour
1 teaspoon baking powder
1/2 teaspoon baking soda
1/4 teaspoon kosher salt
1/2 cup unsalted butter, cubed and room temperature
1 1/2 cups packed brown sugar
2/3 cup peanut butter
1 1/2 teaspoons vanilla extract
2 eggs, room temperature
30 Reeses Peanut Butter Cups (about 1 bag), chopped
1/3 cup white chocolate chips

Servings: 18 Big Squares

Instructions:
Preheat your oven to 350 degrees F. Line and/or grease a 9×13 pan (or two 8x8 pans). In a medium bowl,beat together the butter and brown sugar until light and fluffy, at least 3 minutes. Mix in the eggs, one at a time, then the peanut butter, vanilla, and almond extract, until thoroughly incorporated. Then add the baking powder, baking soda, and salt, mixing thoroughly until combined. Add flour in in three steps making sure it is fully incorporated between each addition. Do not over mix dough, only mix until incorporated.

Fold in the chopped Reeses and the white chocolate chips. This dough is sort of thick, so I found it easiest to press it into my pan with clean hands. Bake for 20 minutes, then cover the top with aluminum foil and bake for another 5-10 minutes, until set (the foil will ensure that the top doesn’t brown too quickly). Allow to cool completely, then cut into squares and serve.

Nutritional Information:

Recipe From: http://crepesofwrath.net/2011/03/30/reeses-peanut-butter-cup-blondies/

This recipe originally called for a 1/2 tsp almond extract but I found that this added a slightly off flavor to the whole thing and detracted from the whole recipe. I removed it from the recipe here, but feel free to add this back in if you feel so inclined.

These blondies turn out to be like the peanut butter equivalents to brownies, with a nice fudgy texture.

Sunday, May 8, 2011

Hawaiian Pineapple and Ginger Dessert

If you like ginger this dish will have you over the moon. The fresh ginger and pineapple has a strong flavor while the sugars to mellow it out and bring the whole dish together. Makes an excellent ice cream or cake topper.

Ingredients:
16 ounce fresh/frozen/canned pineapple chunks
1 cup chopped fresh ginger root, about 10-12 ounces
¼ cup sugar
4 Tablespoons honey
4 Tablespoons vegetable oil
1 Tablespoon pumpkin pie spice

Servings:Makes about 1.5 cups of "topping"

Instructions:
Sautee the ginger in the oil for 5 minutes or so, until it starts to soften a little bit. Then add in the sugar, honey and pumpkin pie spice. Continue cooking 10-15 minutes or until ginger is done to your desired level of softness. The longer you cook the sugar combination the thicker the syrup will be also.

Once cooked, allow to cook for 5-10 minutes and then combine with the pineapple. Use it as an ice cream topper or cake topper.

Nutritional Information:

Recipe From: http://www.aroundhawaii.com/lifestyle/food/2009-01-hawaiian-pineapple-and-ginger-dessert.html

I made this dish for Supper Club's Hawaiian Night. While not particularly Hawaiian unto itself, it does have some vary Hawaiian flavors. In any case it was a fantastic experiment that came out great. I served it over homemade vanilla bean ice cream and it was fantastic, but I could also see this on top of pound cake or angel food cake. The ice cream also helped take some of the bite from the ginger, so non-ginger lovers could just add a little more ice cream. A great alternative to Bananas Foster and it whips up in minutes.

Saturday, April 30, 2011

Ranger Cookies


This is a crunchy crispy all around great cookie base. Use it as a spring board to add in other ingredients to tailor it to your tastes. Fruits, nuts and any flavored chips will only make this cookie better!

Ingredients:
1 cup brown sugar
1 cup granulated sugar
1 cup butter
2 large eggs
1 teaspoon vanilla extract
2 cups flour
1/2 teaspoon baking powder
1 teaspoon baking soda
1/2 teaspoon salt
2 cups oatmeal
1 cup coconut
2 cups Rice Krispies
*Add Ins*

Servings: 2-3 dozen cookies (depending on size)

Instructions:
Preheat oven to 375°F.

Cream the butter with the white and brown sugar. Add in the baking powder, baking soda, salt and vanilla and stir until combined.

Add in the eggs one at a time, mixing between each egg. Add flour in 3 or 4 increments mixing well between each addition.

Stir in oatmeal, coconut, and Rice Krispie cereal and mix well by hand. Add any addition ingredients you might like at this time. Fruit, nuts, chocolate etc.

Roll into small balls and flatten with a hand or the back of a spatula. Bake on an ungreased cookie sheets for 10-12 minutes or till light brown. Remove carefully from the pan and transfer to a cooling rack until cooled.

Nutritional Information:

Recipe From: http://www.food.com/recipe/ranger-cookies-19445

This cookie is okay with out any add-ins but when you add in some extra goodies that is when this cookie really shines. Add in as much or as little as you want and you can add just about anything your heart desires. I have made it with cranberries, white chocolate, chocolate, butterscotch, nuts and combinations of all of those and the cookies always turn out fantastic.

I first stumbled onto this recipe when looking for cookies to send out for a friend who was deployed to the desert. These cookies travel well and hold up to some tough conditions but still taste great and they freeze well too. My personal favorite is cranberry, white chocolate and almonds.

Hawaiian Bread


A new twist old fashioned banana bread. This bread combines coconut, pineapple, macadamia nuts and bananas to make a moist loaf of bread with a variety of textures and flavors that all blend together to make an excellent bread.

Ingredients:
2 3/4 cups flour
1 teaspoon baking soda
2 cups sugar
1 teaspoon salt
1 cup macadamia nuts, chopped
3 eggs, beaten
1/2 cup cooking oil
1/2 cup apple sauce
1 teaspoon vanilla
1 (8 ounce) can crushed pineapple
1/2 cup coconut, toasted
2 bananas, mashed

Servings: Makes 2 loaves (16 Slices)

Instructions:
Preheat oven to 350 and grease and flour two 9x5" loaf pans.

Combine flour, soda, sugar, salt, and nuts in mixing bowl, and blend. Add remaining ingredients and mix well.

Bake at 350, for 1 hour

Nutritional Information: http://recipes.sparkpeople.com/recipe-detail.asp?recipe=1616824

Recipe From: http://www.food.com/recipe/chris-hawaiian-bread-257940

I was looking for "authentic Hawaiian" desserts for Supper Club and found that other than Hupia, no one has much of anything! So then I broadened my horizons and found this recipe online. I thought it sounded fairly "Hawaiian" with the pineapple, macadamia nuts and coconut and decided to give it a go.

It turned out to be a fantastic experiment. I modified the original recipe and toasted the coconut because I think it gives it a richer flavor. I also replaced half the oil with apple sauce for a healthier option. The bread came out moist and delicious without all the extra fat. If you wanted to cut a few more calories I think you could easily cut out another 1/2 cup of sugar or bake this with Splenda and the recipe still wouldn't lose anything as the sweetened coconut adds a bit of sugar itself.

Friday, April 29, 2011

Crunchy Nutella Brownies


This brownie has a thick chocolate fudgy layer on the bottom and a melt in your mouth creamy and crunchy chocolate hazelnut layer smoothed on top.

Ingredients:
Brownie Layer
1 cup semi-sweet or dark chocolate chips
1 stick unsalted butter, cut into pieces
1-3/4 cups sugar
3 eggs
1 teaspoon vanilla extract
1 cup flour

Nutella Crunch Layer
1-1/2 cups semi-sweet chocolate chips
1 cup Nutella
1 tablespoon unsalted butter
1-1/2 cups rice cereal

Servings: 16 large brownies

Instructions:
Preheat the oven to 350 degrees. Line a 9×13 pan with lightly greased foil.

In a large glass bowl, microwave the chocolate chips and butter at 30 second intervals until melted. Stir until smooth.

Add the sugar, eggs, vanilla, and flour. Add in each ingredient one at a time, stirring until combined before adding the next ingredient.

Bake at 350 degrees for 35-40 minutes, or until the edges are completely set. Do not overbake (the middle will not be completely set)!

After you take the brownies out of the oven, while they are cooling in their pan, make the frosting. In a medium-sized glass bowl, microwave the chocolate chips, Nutella, and butter for 30 second intervals, until melted. Stir until smooth. Let cool for 2-3 minutes. Stir in the rice cereal.

Immediately spread the frosting over the brownies.

Cool brownies completely before enjoying.

Nutritional Information: http://recipes.sparkpeople.com/recipe-calories.asp?recipe=1615720

Recipe From: http://lacasadesweets.com/blog/2011/04/25/crunchy-nutella-brownies/

This turned out to be a fantastic brownie, but not at all what I was looking for. It is fudgy on the bottom and smooth and creamy with a prefect blend of hazelnut and chocolate on top to kick these brownies up a notch, not to mention the extra texture the rice cereal adds. But I had wanted to send a care package to a friend in the desert, which means I needed hardy cookies and brownies. Something that can take the transport time, heat and over all abuse. This amazing little brownie is too fudgy on the bottom and far too soft on the top, even minutes out of the refrigerator.

Don't get me wrong, it is fantastic when it is fresh in your home, the two layers combine everything Jason loves in a brownie, but don't expect this treat to stand up to time in the sun at a cook out or make it through week in sun and sand on its way to the desert.