Saturday, July 30, 2011

Avocado Blue Cheese Dressing


This heavenly dressing combines all the creaminess of avocados with the sharpness of blue cheese in every mouth watering bite. Goes well on a plain salad or kick up a main course salad with this dressing as it goes well with chicken and beef. Heck, using it as a sauce on steak or chicken to dress up the grill meat, fantastic all around.

Ingredients:
3 oz. blue cheese, crumbled
1 avocado
1 tablespoon finely chopped shallots**
2 tbs. light sour cream
1/4 cup milk
1 tablespoon fresh lemon juice or white wine vinegar
1 tsp. red wine vinegar
salt, pepper, olive oil

Servings: 2 generous servings, 4 if your stretching it

Instructions:
**Saute the shallot with a tsp. of olive oil until soft and fragrant. Let cool for a few minutes and transfer to a small mixing bowl.

Add all ingredients except avocado to the bowl with the shallots and mash/stir them together. It’s up to you how chunky you want it to be.

Slice the avocado and add to the mixture. Mash/stir to your desired consistency. Season with salt and pepper. If it’s too thick, another tbs. of milk.

Recipe From: PinchOfYum.com

**I have made this 3 times now and never have I been able to get the shallots when I got around to making this. Everyone is out of shallots, every time. I think the shallots would make a great addition, but if you don't have them, don't let this stop you. It also cuts down on prep and makes this a no cooking at all recipe.

I also often throw all the ingredients into my KitchenAid immersion blender chopper attachment and pulse a few times. The blue cheese will be in small chunks but the avocado pretty much liquefies. I never need to add more milk when I make it with this method. But this recipe could just as easily be done with a potato masher or a fork!

Once this stuff is made, eat it right away. It has avocado in it, and even with the lemon juice and vinegar it is going to turn disgusting poo brown in a bit where it meets the air. Still tastes great when it is poo brown, but doesn't look all that great.

This stuff is sinfully delicious, melt in your mouth amazing. Best dressing I have ever made. You can also use it as a steak sauce, also, amazing. But I don't want to know how many calories are in it, no one ever tell me that fun fact.

Friday, July 29, 2011

Ham and Cheese Bread


A flavorful quick bread that works well as a side or a main dish. The meat and cheese can easily be swapped out in this recipe for increased versatility.

Ingredients:
5 tablespoons extra- virgin olive oil, plus extra for oiling the pan
1 1/4 cups unbleached, all- purpose flour
2 teaspoons baking powder
1/2 teaspoon fine sea salt
3 large eggs, lightly beaten
1/3 cup plain yogurt (I used Greek)
5 ounces aged Extra Sharp Cheddar cheese, cut into 1/4- inch cubes
5 ounces best- quality cooked ham, cut into 1/4- inch cubes
2 tbsp fresh basil, chopped

**1/3 cup best- quality black olives, pitted and halved

Servings: 1 Loaf pan

Instructions:
Center a rack in the oven. Preheat the oven to 400°F. Lightly oil an 8x4 inch loaf pan.

In a large bowl, combine the flour, baking powder, salt, eggs, olive oil, and yogurt. Stir to blend. Add the cheese, ham, and olives, and stir just to combine the ingredients.

Pour the batter into the prepared pan. Place the pan in the oven and bake until the bread is firm and golden, 25 to 30 minutes. Remove the pan from the oven and place it on a wire rack to cool. Once cooled, unmold and serve the bread at room temperature. (Store at room temperature wrapped in foil for up to 3 days.)

Recipe From: Projectfoodie.com

The original recipe called for the olives, but I left those out, because I hate them. It also called for aged French Comté cheese, which I didn't have. So I just used some of my extra sharp cheddar and thought this came out great. You could easily use turkey and Gouda, roast beef and provolone. Go crazy with it, it should work out perfect.

I baked this in a 9x5 inch pan and wished that I had used a 8x4 as this came out as a very squat little loaf of bread. Still tasted great, but not quite as pretty. It also came out very dense, but not too bad, I might try tinkering with leavening agents next time.

Also make sure you cube the cheese and not shred it, otherwise the cheese will sort of disappear into the bread and you wont get those awesome cheesy chunks inside. This is best served warm, but still good cold in my opinion.

Peanut Butter Banana Muffins


A quick tasty peanut butter banana muffin, with an option of adding a bit of nutella if your looking for an extra treat. Filling and not too sweet.

Ingredients:
3/4 cups all-purpose flour
1 cup Whole wheat flour
1 teaspoon baking powder
1/2 teaspoon baking soda
3/4 cup granulated sugar**
1/4 cup unsalted butter, soften
1/4 cup peanut butter
2 eggs
3 large bananas, mashed (1 cup mashed banana)
1 banana, sliced for garnish

**Replace with 1/4 cup and 2 tbsp Splenda 1/2 and 1/2

Servings: 12 Muffins

Instructions:
Preheat over to 350F. Grease muffin tin or line with muffin liners.
In a small bowl, whisk together flour, baking powder, baking soda and salt.

In another bowl, cream together sugar and butter until fluffy, about 5 minutes. Beat in peanut butter. Add in the eggs, one at a time. Then mix in mashed banana.

With the mixer on low speed, beat in the flour mixture until just combined.

Evenly distribute batter into the muffin cups. Top with sliced banana. Bake for 20 to 25 minutes, until a tester comes out clean.

Nutritional Information: Peanut Butter Banana Muffins

Recipe From: LululuAtHome.com

I tried to make these muffins a bit healthier, but only shaved off a few calories in the end. But you wont notice the loss of those calories at all. Using a better peanut butter might also help shave off some calories and fat. I used Skippy Supper Chunky because that is what I had on hand (left over from making some cookies).

Now if you want to go indulgent I added about 1 tsp of nutella in the middle of half of them for Jason. However, he said it would have been just as good "frosted" on top instead of baked inside. When baked inside it came out like when you put a Hersey kiss inside a muffin, so nothing too special. I was hoping it would keep its creaminess inside, no joy.

Monday, July 25, 2011

Banana Zucchini Cranberry Almond Bread


Healthy, flavorful and goes together in less than 20 minutes, this zucchini bread will satisfy all of your cravings without all of the guilt.

Ingredients:
3 eggs
1/2 cup apple sauce
1/3 cup vegetable oil
1/3 cup packed brown sugar
1 cup white sugar**
1 1/2 cup grated zucchini
2 cup bananas, mashed (3-5)
2 teaspoons vanilla extract
2 2/3 cup whole wheat flour
1 cus all-purpose flour
2 tbsp pumpkin pie spice
1 tsp ginger
1 1/2 tsp baking powder
1 tsp baking soda
2/3 cup dried cranberries
2/3 cup slivered almonds
**I subbed 1/2 cup splenda for baking

Servings: 2 loaf pans

Instructions:
Preheat oven to 325 degrees F (165 degrees C). Grease and flour two 8x4 inch bread loaf pans.

In a large bowl, beat eggs until light yellow and frothy. Add oil, apple sauce, brown sugar, white sugar, grated zucchini, bananas, and vanilla; blend together until well combined. Stir in the flour, pumpkin pie spice, ginger, baking powder and baking soda. Mix in the cranberries and nuts. Divide the batter evenly between the two prepared loaf pans.

Bake in the preheated oven until a toothpick inserted in the center comes out clean, about 50 minutes. Allow to cool in the loaf pans on a wire rack before removing and serving.

Recipe From: AllRecipes.com

I made quite a few modifications from the original recipe in order to make this more flavorful and make a few healthy improvements. I exchanged most of the all purpose flour for whole wheat, cut out most of the oil and replaced it with apple sauce, cut out a lot of the sugar (which you wont miss) finally I added extra zucchini and banana to keep it all moist and pack in some extra flavor.

I made a few tweaks with the spices but that will all be up to personal taste in this recipe and can be modified as you like. Don't have pumpkin pie spice? Add in nutmeg, cinnamon, all spice, cloves etc. Prefer walnuts to almonds, make the switch. Don't like craisins, use raisins. But I would recommend keeping some sort of sweet dried fruit in there or bump up the sugar a little bit (unless your going to slather this in cream cheese and then you wont notice).

Sunday, July 17, 2011

Artichoke Gratinata


A much healthier side dish than the standard artichoke dip but with all the flavor still there. Simple flavors combine to make this delicious side dish with a lot less guilt.

Ingredients:
3 tablespoons olive oil
1 garlic clove, minced
1 pound frozen artichoke hearts, thawed (or 2 cans, drained)
2 tablespoons chopped fresh parsley leaves
3/4 teaspoon salt
1/4 teaspoon freshly ground black pepper
1/2 cup chicken broth
1/4 cup Marsala wine (or red table wine)
4 tablespoons butter
2/3 cup Italian bread crumbs
2/3 cup grated Parmesan

Servings: One 6x11 baking dish

Instructions:
Preheat the oven to 450 degrees F.

Warm the olive oil in a heavy bottom skillet over medium-high heat. Add the garlic and cook for 1 minute. Add the artichoke hearts, parsley, salt, pepper and cook until the artichoke hearts are starting to brown at the edges, about 3 minutes. Add the chicken broth and wine and simmer for 3 minutes. Transfer the artichoke mixture to a 2-quart baking dish.

Melt the butter in the same skillet used to cook the artichokes. In a small bowl mix the melted butter with the bread crumbs. Stir in the Parmesan and top the artichokes with the bread crumbs. Bake until the top is golden, about 10 minutes.

Recipe From: www.foodnetwork.com Diada de Laurentiis

I thought this recipe sounded interesting for Italian night, I really enjoy artichokes, a vegetable I seem to have come to love late in life and this one looked tasty. Turns out it was, it also whipped up in minutes!

The major change I made was to use red table wine, we just couldn't fine Marsala wine, but the dish came out fine. I also doubled the topping because when I put the dish together it just didn't look right. Maybe it was because I used a long narrow dish, maybe in an 8x8 it would have looked better. In any case I think the extra topping added flavor and some crunch. Since I had to use canned artichokes the extra crunch was nice.

Italian Cheese Polenta

No Photo!
Oh Nos!


Jason calls this "Italian Grits" but this was better than any of the other grits I have ever eaten. Smooth, creamy and a great base to put other juicy meats on top of. Add some crusty bread to mop everything up and you have a great dinner.

Ingredients:
2 cups whole milk
2 cups chicken broth
1 1/2 teaspoons kosher salt
1 cup polenta or yellow cornmeal
1/2 teaspoon freshly ground black pepper
4 tablespoons unsalted butter
4 ounces Italian cheese, shredded
1-2 tablespoons Italian herbs of your choice
1 tablespoon minced garlic (sauted if using fresh)

Servings: 6-8

Instructions:
In a large pot add the milk, broth, and salt. In small incriments whisk in the polenta/corn meal making sure it is smooth with no lumps. Slowly bring heat up to medium and cook until thick and creamy. Remove pot from stove, stir in pepper, butter, cheese, herbs and garlic. Serve warm or place into a pan, bake and then slice.

Recipe From: AllRecipes.com

Most recipes say you should boil the liquids and then add the corn meal/polenta. However many reviewers said the opposite, that doing this leads to lumpy polenta. Since this was my first time cooking and eating polenta, I opted to follow the masses and went with the cold start and it worked great. This goes together so fast and its so easy, I thought it was pretty good and would make it again in a heart beat.

Spiced Up Healthy Zucchini Bread


This is a healthy and fantastic zucchini bread. Moist and packed with flavor and not too much guilt in each slice. Not only will you not notice your eating your vegetables but you will enjoy every minute of it.

Ingredients:
2 C grated zucchini, about 3 small to medium zucchinis
1 C all purpose flour, sifted
1 C Whole wheat flour
3/4 C granulated sugar
1/2 tsp all spice
1/2 tsp cloves
1/2 tsp nutmeg
1/2 tsp ground ginger
2 tsp cinnamon
1 tsp baking powder
1 tsp baking soda
2 large eggs
1/2 C apple sauce
1/4 C oil
1 tsp vanilla extract

Servings: 1 Loaf

Instructions:
Preheat oven to 350Âş. Spray 10 inch loaf pan with cooking spray.

Combine all of the dry ingredients in a medium bowl.

Whisk eggs, oil and vanilla in a large bowl. Gradually add the dry ingredients to the wet ingredients and stir with a rubber spatula or wooden spoon to combine. Add grated zucchini and stir. It may seem a bit difficult or hard to mix it all together at first but the moistness from the zucchini will help it all come together.

Pour mixture into the prepared loaf pan and bake on middle rack for 50 to 60 minutes or until toothpick comes out clean.

Let sit in pan for 10 minutes and then let cool on wire rack.

Recipe From: KitchenRunway.com

The original recipe didn't have enough "spice" for me, I doubled everything and added some ginger for a bit more kick. I also did half and half all purpose flour and whole wheat, but I think you might be able to do all whole wheat, all the zucchini moisture keeps things super moist. I also cut down on the oil by subbing apple sauce (1 single serving cup is 1/2 cup) to cut out some more fat.

A sugar substitute could be used, but I don't have any of that in the house. Instead I cut the sugar from 1 cup to 3/4 cup, cutting it to 1/2 cup sugar might be too little but if your one to put cream cheese or butter on your bread you might not notice (I eat mine plain).

If your a nut fan this would lend itself to taking nuts well, I added some roasted almonds on top just to make it look pretty. You could also toss oats on top for a nice look too. I think you could toss in raisins, dried cranberries or dried cherries, heck all three and you would still have a nutritious and tasty bread.

This recipe is far from bland and so moist if you slice it while its warm you will worry you under cooked it. Don't panic, the bread is just fine and needs to sit for a short bit and cool for it to finish.

Friday, July 15, 2011

Blueberry-Streusel Bars with Lemon Cream Filling


These little bars are more blueberry than lemon, but have just enough lemon to make the lemon lovers happy. A great pairing of the two flavors with a streusel topping that adds some crunch.

Ingredients:
3 cups (13-1/2 oz) all-purpose flour
1 1/2 cups rolled oats (not quick oats)
1 1/3 cups packed light brown sugar
1 teaspoon salt
1 teaspoon baking powder
1 cup (2 sticks) unsalted butter, at room temperature
1 large egg, separated
14 oz can sweetened condensed milk
1/2 cup fresh lemon juice (2-3 lemons)
2 teaspoons lemon zest (2-3 lemons)
3 cups room-temperature blueberries

Servings: 1 9x13 Pan or 2 8x8 pans

Instructions:
-Preheat oven to 350 F. Line a 13x9 metal baking pan with foil, leaving a slight overhang on both sides to lift the bars out. Spray the pan/foil with cooking spray. If you forget to line the pan, or don't have the stuff for it, don't panic. Just easier to make these look pretty when you can lift them out.

Mix the flour, oats, brown sugar, salt and baking powder together in a mixer or large bowl. Use a pastry blender (or your fingers) to cut the butter into the dry ingredients completely (again, or just use the mixer) until fine and sand like. Set aside and reserve 2 cups of these crumbs for the topping.

Beat the egg white with a fork until broken up and foamy. Add it to the crumbs and mix to incorporate. Transfer the mixture to the prepared pan (or pans) and press to form an even layer of crust. Bake for about 10-12 minutes, or until the top starts to look dry.

Meanwhile, whisk the condensed milk, lemon juice, lemon zest, and egg yolk together in a medium bowl. Let stand for 5 minutes; the mixture will begin to thicken slightly.

When the crust has finished baking, transfer the pan to a wire rack and sprinkle the blueberries evenly over the hot crust. Drop spoonfuls of the lemon mixture over the blueberries then spread the lemon mixture gently to distribute it. Work carefully so you don't crush the berries; the lemon layer doesn't have to cover every bit of the crust. Bake until the lemon layer begins to form a shiny skin, about 7-8 minutes.

Remove the pan to a wire rack and use your fingers to press the reserved crumb mixture into small clumps and sprinkle them over the lemon layer. Use all of the crumb mixture to cover the lemon layer completely. Bake for 25-30 minutes, or until the filling is bubbling at the edges and the streusel topping is golden brown.

Shortly after these come out of the oven, you can eat this with a spoon if you like to serve is sort of cobbler style. It is great this way. I made the mistake of trying to cut these bars while "just warm" as the original instructions say and found them to be a mess this way, but very tasty! Otherwise, cool and chill completely before trying to cut these into bars! Store in the refrigerator.

Nutritional Information:

Recipe From: Tracey's Culinary Adventures

I made these for a BBQ in two 8x8 pans (unlined), some day I will have an oven big enough for a 9x13 inch pan, some day. However I did each one of these one at a time. I baked the crust on one, applied blueberry and lemon, baked and then did the stopping. Then I did the other pan. I think it will get soggy if you try to leave the "filling" on the baked crust while waiting for the other one to finish, so careful.

I also don't see why you couldn't mix the blueberries and the filling and then spread in the pan. I didn't try it, but co crazy with it, I don't think it will matter one bit.

I added more blueberries than the original recipe called for (they wanted 2.5) but I had thawed about 3 cups and I think this worked better any way. The blueberries more "evenly coated" my two 8x8 pans. Maybe in a 13x9 the 2.5 cups would have been perfect but I wanted the extra that I had thawed. Also, feel free to use frozen. Fresh would be better I am sure, but frozen still made one tasty bar.

Serve them warm or cold, I found both ways tasty. Cold makes great bars, warm makes great spooned "crisp". Warm with good vanilla ice cream might be perfect for a winter treat.

Corn Casserole

Image To Be Added Later!
Somehow I forgot!


A great dish for a BBQ or pot luck, but a bit rich and calorie intense for everyday eating. Quick, easy and tasty this corn side goes together fast

Ingredients:
1 (15 1/4-ounce) can whole kernel corn, drained
1 (14 3/4-ounce) can cream-style corn
1 (8-ounce) package corn muffin mix (recommended: Jiffy)
1 cup sour cream
1/2 cup (1 stick) butter, melted
1 cup shredded Cheddar (completely option, your not missing much with out it)

Servings: 6-10 servings depending on how much you want!

Instructions:
Preheat oven to 350 degrees F.

In a large bowl, stir together the 2 cans of corn, corn muffin mix, sour cream, and melted butter **. Pour into a greased 9 by 13-inch casserole dish (you can cook this in an 8x8 but you need to cook this for closer to an hour). Bake for 45 minutes, or until golden brown. Remove from oven and top with Cheddar. Return to oven for 5 to 10 minutes, or until cheese is melted. Let stand for at least 5 minutes and then serve warm.

**Alternately you can mix in the cheese (if using) into the recipe so it doesn't form that hard crust layer on top if the dish gets a little cold on the way to the BBQ or what ever. Cooks the same, tastes the same.

Nutritional Information: It is a Paula Dean recipe, you don't want to know

Recipe From: http://www.foodnetwork.com/recipes/paula-deen/corn-casserole-recipe/index.html

I have made this dish a few times because it is quick, tasty and corn-tastic. It goes great with BBQ food or pot lucks but I find it a bit rich for a normal everyday side so avoid this one if your on a diet or trying to eat healthy in any way shape or form.

I have cooked this in 8x8 pans most of the time and it comes out just fine, you just might have to cook it a bit longer than if it was in a larger pan. Also, if you under cook this a bit the dish is still fine and still tastes good. Just changes the texture from its normal thick bread like consistency to a more creamy consistency, so don't fret too much about the cook time.

I also don't think the cheese adds too much to the recipe. The last time I made it I tossed in about 1/3 cup, mixed it into the dish and didn't put any on top. Came out just fine. So feel free to play with the cheese. Add it, don't add it. Mix it in, or spread it on top. This recipe is flexible and pretty idiot proof in all reality.

Wednesday, July 13, 2011

Roasted Butternut Squash and Bacon Pasta


This is creamy, sort of healthy and includes bacon, what is not to like? Prep time can be a bit longer than some other recipes but this finishes up melt in your mouth amazing.

Ingredients:
1-2 tablespoons of Olive Oil
1/2 teaspoon dried rosemary
1/2 teaspoon dried Thyme
1/4 teaspoon freshly ground black pepper
3 cups (1-inch) cubed peeled butternut squash
Cooking spray
6 Bacon slices (raw)
1 cup thinly sliced shallots
8 ounces uncooked mini penne (tube-shaped pasta)
1/4 cup all-purpose flour
2 cups 2% reduced-fat milk (or skim, fat free, 1%, what ever you have)
3/4 cup (3 ounces) shredded sharp provolone cheese**
1/3 cup (1 1/2 ounces) grated fresh Parmesan cheese

**What cheese you choose insn't as important as choosing good cheese. I used shredded parmigiana, asiago and some other hard Italian cheese. This recipe would also work with white cheddar (though this would change things up a bit), Gouda or smoked white cheeses.

Servings: 4-6 depending on how hungry you are

Instructions:
Preheat oven to 425°.

Combine rosemary, thyme, pepper, olive oil and squash in a bowl or Tupperware bin and mix to coat. Place squash on a foil-lined baking sheet coated with cooking spray (or silicone mat). Bake at 425° for 20-40 minutes or until tender and easily pierced with a fork. This step can be done in advance a few days before if desired and refrigerated until needed.

Increase oven temperature to 450°.

Cook the bacon in a large nonstick skillet over medium heat until crisp. Remove bacon from pan, reserving 2 teaspoons drippings in pan and reserving 2 tablespoons drippings for later; crumble bacon. Increase heat to medium-high. Add shallots to pan; sauté 8 minutes or until tender. Combine squash mixture, bacon, and shallots; set aside.

Cook pasta according to the package directions, omitting salt and fat. Drain well.

Combine flour and 2 tablespoons bacon drippings in a Dutch oven over medium-high heat. Whisk until bubbly. Gradually add milk, stirring constantly with a whisk; bring to a boil. Cook 1 minute or until slightly thick and beginning to boil, stirring constantly. Remove from heat. Add provolone (or what ever cheese you choose), stirring until cheese melts. Add pasta to cheese mixture, tossing well to combine.

Spoon pasta mixture into an 11 x 7-inch baking dish lightly coated with cooking spray; mix in squash mixture. Sprinkle evenly with Parmesan cheese (or more of the cheese you used int he sauce). Bake at 450° for 10 minutes or until cheese melts and begins to brown.

Nutritional Information: http://www.myrecipes.com/recipe/roasted-butternut-squash-bacon-pasta-10000000592277/

Recipe From: Cooking Light http://www.myrecipes.com/recipe/roasted-butternut-squash-bacon-pasta-10000000592277/

I love pumpkin, or as many people call it, acorn squash. I frequently pick up a half of one from the store, chop it up and roast it with Rosemary and Thyme so this recipe was perfect for me. Healthy and light side dish, meet full on delicious main dish. It is almost as healthy as the original, I just added 2 tablespoons of bacon fat (but I used fat free milk, so maybe I came out even).

Sausage could easily be substituted for the bacon in the recipe if your so inclined or have it on hand. You could even try this recipe with soysage for the vegetarian crowd but you would miss out on the fat drippings (and I don't think butter would have as great of an effect) and that is what takes this recipe from pretty good to great.

Any white cheese should do in a pinch but try to pick something with flavor. Mozzarella, plain provolone etc will leave this dish a bit lacking but would still let it turn out okay. But add more bacon, or sausage to help bring this up to super tasty. I think cheddar would also work, but it might not be as good with the squash. You can try it, but I will be sticking with white cheeses.

Southwest Turkey (or Chicken) Burgers


Mmmmmmmmm, mmmm, good. Turkey burgers are often dry or flavorless but, rarely, they can be phenomenal. This is one of those phenomenal turkey burgers. Full of flavor and moist.

Southwest Turkey/Chicken Burgers
Modified from Epicurious

1 pound ground turkey or chicken thighs
1 can of NM Hatch Green Chiles (with liquid)
2 tsp chili powder
2 teaspoons ground cumin
1 1/2 teaspoon salt
1/4 teaspoon pepper
4 tablespoons chopped fresh cilantro

To the ground meat, add all the ingredients above. Form into patties and grill or pan fry. If you make them particularly thick, form a hole in the center to make sure that all surfaces cook through before drying out. (A trick I actually learned from Costco.) I recomend topping with quacamole or adobo chili mayonnaise/aioli. I enjoyed mine on a bolillo loaf (above) while Dave went the more traditional route on a potato bread bun. Mmmmmmmmm...

Monday, July 11, 2011

Homemade Yogurt and Paneer Cheese

Well I had a WHOLE GALLON of milk go sour on me here in Texas. So, I tried to find a use for them since I knew they weren't bad, just sour. So searching the intertubes I came across making yogurt and making paneer.

If you know me, you know I don't let milk go to waste so I proceeded to make both. I had previously made paneer that resulted in a delicious ricotta, but left something to be desired as paneer (recipe for the delicious ricotta to be posted when I am sure I can recreate it). So I made attempt #2 at paneer and it came out as, well, paneer. I am not thrilled with the concept of paneer itself. Tasteless cheese. Smothered in Indian Sauces it is heavenly, but it's not because I find the cheese itself lick-the-plate-clean-delicious. The yogurt making however is an endeavor I think I will recreate, perhaps on a more regular basis if this milk-going-sour phenomenon continues (now the third time I have found separated/soured milk).

First the success.


Yogurt from soured (not spoiled) milk
Recipe and accompanying video from About.com

~6 cups milk (I think I used 2% milk, but it doesn't seem to matter)
6 oz yogurt with active cultures

Heat milk slowly in a saucepan. You do not want it to boil. Heat the milk to 180 degrees. You are supposed to keep it at this temperature for 30 minutes but I just turned the heat off at this point then after ten minutes turned the burner back on for just a minute so it maintained 170 degrees for a while. Then you have to let it cool to 115 degrees. I just left it on the counter.

I was worried at this point because it looked a bit curdled. But I proceeded anyway. Once it had cooled to 115 degrees I added the yogurt with the active cultures. It was a vanilla flavored and sweetened yogurt. Then set it in a 110 degree oven overnight. Eight hours seems to be the ideal time. I had the oven on earlier so it was just slightly warm and I set the tupperware inside on a towel and walked away. In fact Dave had to remind me about it in the morning so it was probably 12 hours.

Many sights said it is important not to wiggle or disturb the yogurt during this time. My guess is heed their advice. I took it out and it still looked a little separated, like there was too much whey in with the yogurt. Many homemade yogurts sound like they are much thinner than what you get at the store. Well, I had cheesecloth already from the paneer so I poured off what whey I could and strained more out with the cheesecloth. Since I forgot the yogurt draining on the counter, it strained longer than I would have wanted, but this yielded a deliciously creamy, thick greek style yogurt. It has a mild tart flavor, but nowhere near as acidic as when you buy just plain, unsweetened yogurt in the store.


This is so yummy, I am really considering making it again despite the added work compared the yummy yogurts I buy in the store. (PS Try Almond milk yogurt. I loved it and have found a recipe on how to make that into yogurt too! I would just use bought chocolate almond milk, it's like a desert in a glass!) All I have to do now is add a little fruit or sweetener to it and I will devour it. Many sites suggested using it for smoothies. Maybe if I hadn't strained the yogurt, that would be a good use, but strained this is going to be kept simple to enjoy the lightly tart creaminess. I never thought homemade yogurt would have come out so successfully. Especially when I saw mine curdle, I was figuring I was going to get ricotta again (see below).

Yields about 2 cups of delicious yogurt


Paneer - meh.

The first time I attempted to make paneer I used this recipe and I successfully made a really delicious ricotta. Almost marscapone like in texture and flavor. It was delicious but with the price of milk I know I would not make it soon because I am not that big a fan of ricotta. In my opinion mass-store bought ricotta needs to be cooked to bring out the cheesy flavor. My homemade version of ricotta though had a million uses, just like marscapone.

1 quart buttermilk
2 quarts 2% milk

Boil the milk. Once boiling pour in the buttermilk and stir till solids form. Pour into a cheesecloth strainer and drain the liquid. Let the cheesecloth hang until desired firmness is achieved. My original "problem" here was the cheesecloth bag I used the holes were too big so curds and whey were draining out. But what I did end up with, as I keep raving was delicious ricotta.

Anyway, back to the "successful" paneer. It really was a success. I did make paneer, albeit a little crumbly. Unfortunately I also did not salt or flavor it in any way. If you like paneer, by all means, give this a try. I just like tastier cheeses.

1/2 gallon soured skim milk
1/4 cup lemon juice

Boil on the stovetop. Once boiling, add the lemon juice. (Maybe you should salt the water if you want the cheese to be salted?) The curdles are what you want to keep. The cheesecloth I bought again had too big of holes so I triple folded it. Then I poured in the curdles and whey into the folded cheesecloth over a big bowl. Once mostly drained I tied the cheesecloth and hung it over a bowl to drain for an hour. It took less than that to reach the consistency of paneer. Mine was a bit crumbly, but I think I could have pressed it into a block if I cared to. I just crumbled it over a butternut squash salad (recipe to come).

Now this only yielded about a cup of cheese, but my guess this is partly due to the use of skim milk. The yogurt was at least 2%.

And unfortunately, I forgot ricotta is usually made from the whey after making cheese and I poured all but a cup for baking with down the drain - doh! I doubt I will try making paneer again. I have successfully done it, but the ricotta and yogurt results were so much better I think I will stick with them.

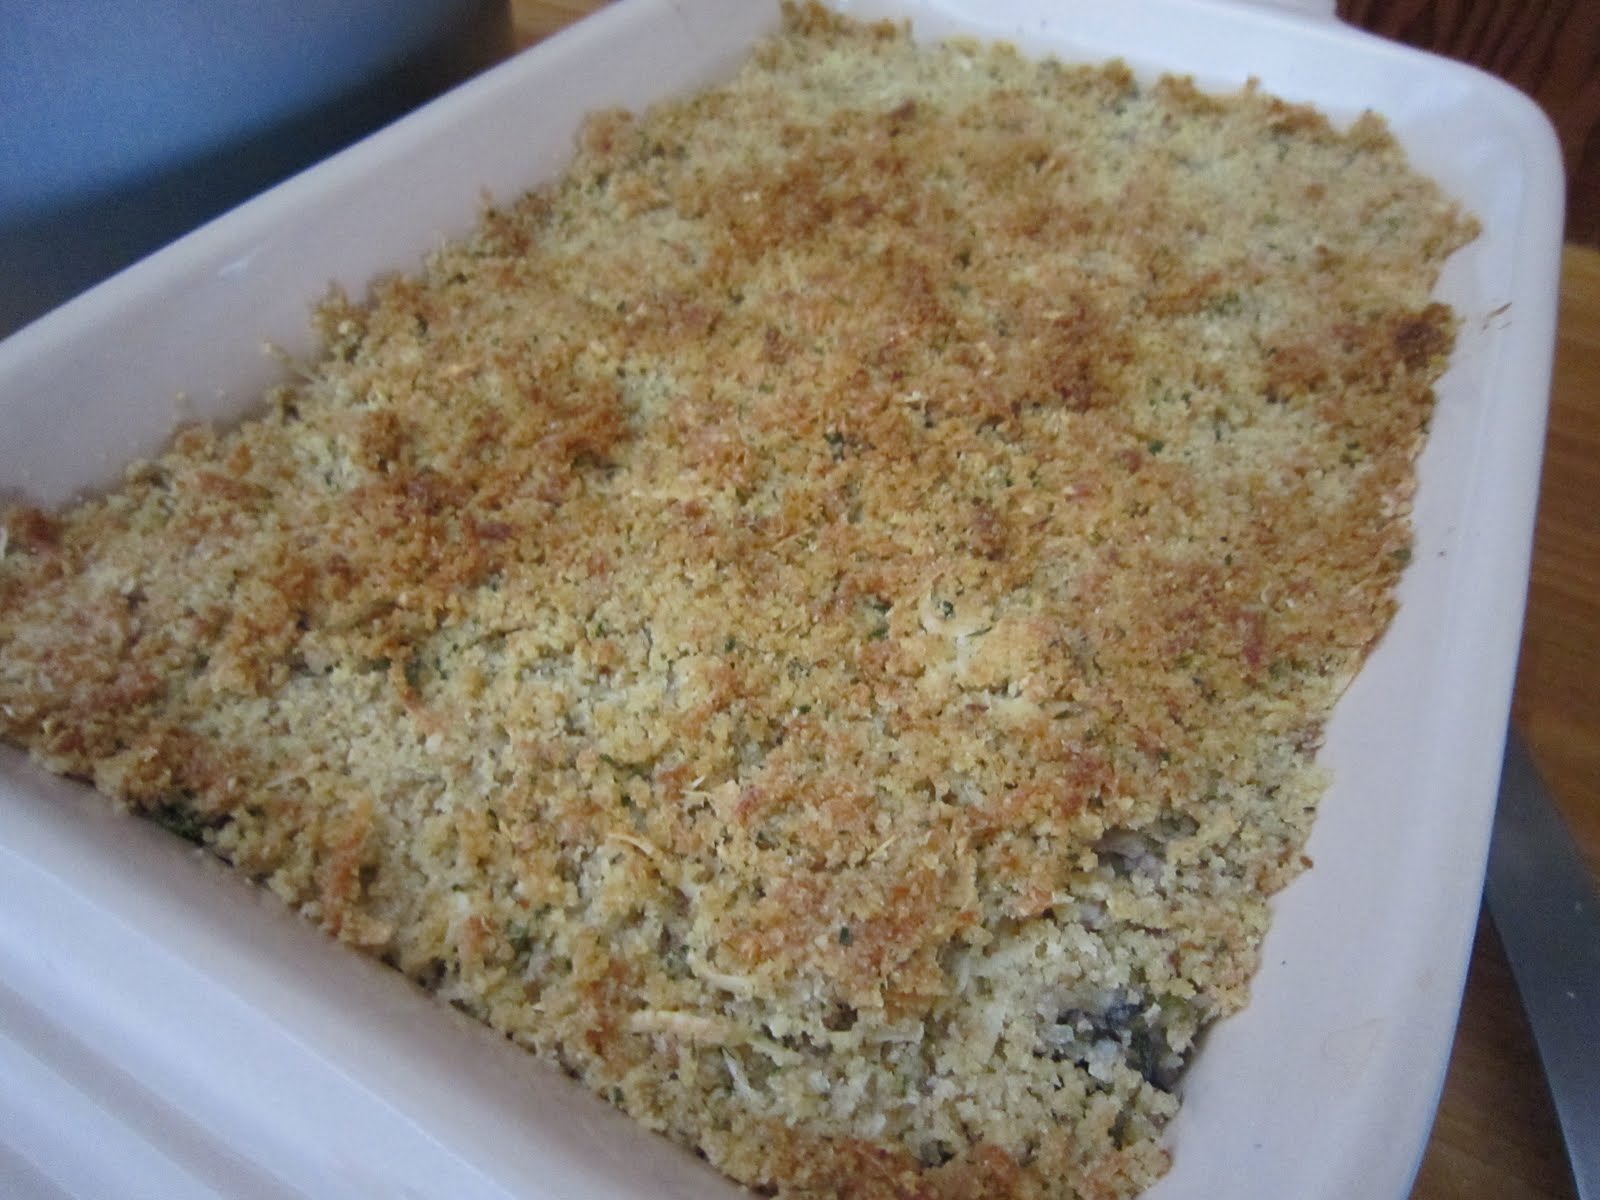
No pictures at the moment. I will try and add some tomorrow. I have to get out of bed in order to take pictures and I have been sick most of the week - almost didn't even use the soured milk - I have sequestered myself to bed in order to try and get to work tomorrow. Although I do still have that sultry smokers voice going for me. Ok, it's not that sultry on me, I am just looking for any bright side. Yogurt! That is my bright side out of all this. Exceeding expectations is always good when cooking and this yogurt did just that. Enjoy!

Monday, July 4, 2011

Bacon n’ Beer Pancakes


The perfect combination of beer, bacon and maple syrup for a very indulgent weekend breakfast. This recipe may have replaced all other pancake recipes for me!

Ingredients:
8-10 slices bacon, cooked until crisp and diced
1 3/4 cup flour
1/4 cup granulated sugar
1 1/2 teaspoons baking powder
1/2 teaspoon kosher salt
1 egg, whites and yolk separated
1 12 oz. bottle nice beer (I recommend something like Newcastle or a nice amber beer – this is definitely not a recipe you can use a cheap beer with because you can taste the beer)
1 1/2 tablespoons vegetable or canola oil
syrup, for serving

Servings: ~8 Pancakes

Instructions:
Cook your bacon how ever you want. I cooked mine in the oven at 375 for about 20 minutes, but you can easily pan fry it. Set aside to cool, then dice (I used kitchen scissors and just cut it up into confetti).

Whisk together your flour, sugar, baking powder, and salt in a large bowl. In a medium sized bowl, whisk together the egg yolk, the beer, and the vegetable oil. In a small bowl, whisk the egg whites until foamy and add them to the beer mixture.

Gently whisk the beer mixture into the flour mixture, until just combined. Fold in the diced bacon. Heat a large pan over medium-high, until hot. Grease your pan with either non-stick spray or butter. Scoop 1/4 cup of batter for each pancake and cook for 2-3 minutes, until bubbling on one side. Flip the pancake and let cook until golden.

Serve with a little butter if you want and lots of good quality maple syrup.

Recipe From: http://crepesofwrath.net/2011/01/31/bacon-n-beer-griddle-cakes/

Jason loves, bacon, beer and breakfast almost as much as he loves lasagna, pizza and sandwiches. So when I saw this recipe up on Crepes of Wrath I knew I had to try it, I just had to wait 3 months for Jason to come home again. I had assumed that this recipe would be novel and interesting, I didn't think it would be fantastically awesome! This is a great breakfast treat, the beer is flavorful but not overpowering, the bacon blends with the beer and the maple syrup perfectly. I don't know that I will make normal pancakes ever again.

These were, fast, easy, super tasty and the perfect breakfast indulgence.

Make sure to use good beer, we went with Sam Adams Boston Lager which was perfect for this. Don't go too pale or it wont mesh with the maple syrup and don't go too dark or it will over shadow everything else. Stick with red to a light dark and I think you will have the optimum flavor.

Saturday, July 2, 2011

Blueberry Coffeecake - my go to blueberry breakfast recipe


Anytime I come home with fresh blueberries I make this recipe, however, it does not require fresh berries. I love this coffeecake so much that I have tried no other. In fact I turned this into a fabulous blueberry crumble recipe just by putting an inch of blueberries below this recipe and baking it. Light, fluffy, stays moist for days if you can resist eating it only in the morning. Warning, if you don't eat this within a few days you should store it in the fridge. I have had the last slice go bad with the blueberries generating an off flavor during the summer months.

2 cups all purpose flour
1/4 cup sugar
2 1/2 teaspoons baking powder
3/4 teaspoon salt
1/4 cup butter (or shortening, but I always use butter)
3/4 cup milk
1 egg, large
2-3 cups fresh or frozen (drained) blueberries, I like a lot of blueberries in mine so I use 3 or 4 cups!
1/2 cup sugar
1/3 cup all purpose flour
1/2 teaspoon ground cinnamon
1/4 cup butter

Heat oven to 375 degrees and grease a 9" spring form pan. Blend flour, sugar, baking powder, salt, butter, milk, and egg. Do not over mix, just till it all comes together. Stir in the blueberries and try not to pop them (unless you want the batter to be blue). Spread the batter in the springform pan. I spray the pan with cooking spray and have never had a problem with it releasing. Now make the crumb topping by cutting the 1/4 cup butter into the remaining sugar, flour, and cinnamon. It should resemble crumbs and yield a good texture if you don't cream the butter, but cut it in. Bake for 45-50 minutes and enjoy! Dave and I usually eat a quarter of the coffeecake each day for breakfast until gone.


The recipe is from a cookbook I copied many years ago and do not have the name of. Here is the original recipe if anyone can identify the cookbook (Mom? Dad?).
UPDATE: Betty Crocker's Old Fashion Cookbook (Thanks Mom)